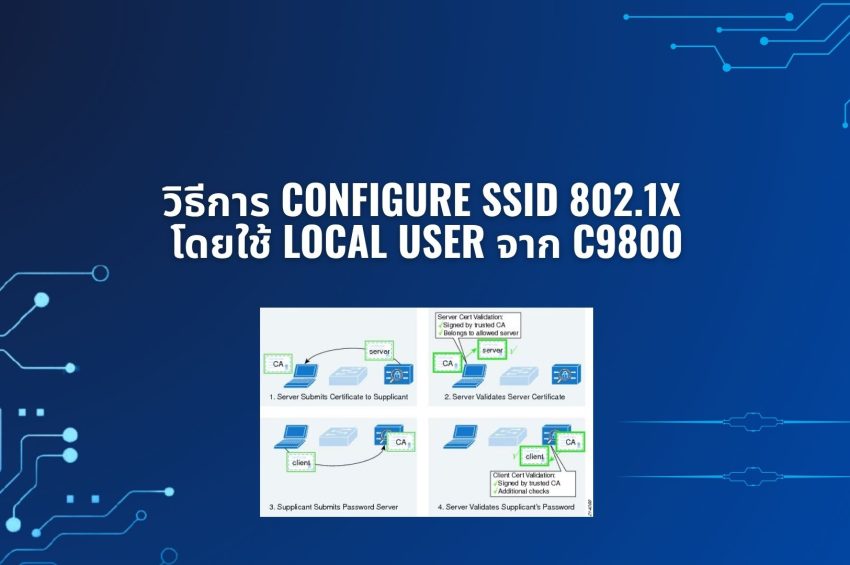
ในโลกของ Wireless Security การยืนยันตัวตนแบบ 802.1x ถือเป็นมาตรฐานที่ได้รับความไว้วางใจในระดับ Enterprise มาอย่างยาวนานจุดเด่นสำคัญคือการแยก Credential ของผู้ใช้งานแต่ละคนออกจากกันอย่างชัดเจน ทำให้เราสามารถดู Log ได้ว่า ใคร เข้าใช้งานในเวลาใดบ้าง
ตัว C9800 เอง สามารถทำตัวเองเป็น Authenticator และ Authentication Server ได้ในตัวเอง ซึ่งเหมาะสำหรับ site ที่ยังมีข้อจำกัดในด้าน Radius server โดย บทความนี้จะพาไปดูขั้นตอนการ Configure SSID แบบ 802.1x บน Cisco Catalyst 9800 โดยใช้ Local User Database บน Controller เอง ตั้งแต่การตั้งค่า AAA ไปจนถึงการ Apply WLAN ให้ใช้งานได้จริง
1. สร้าง Local EAP Profile
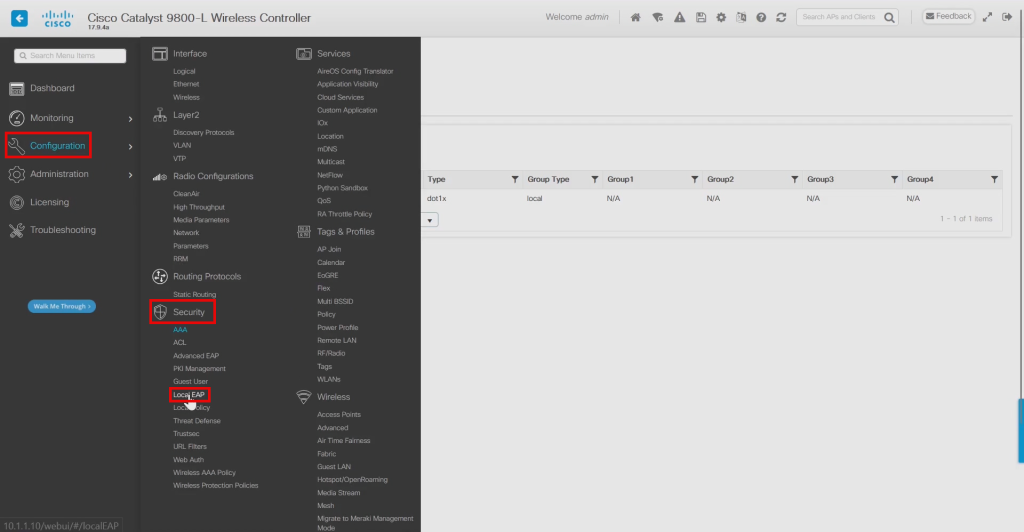
ไปที่ Configuration –> Security –> Local EAP
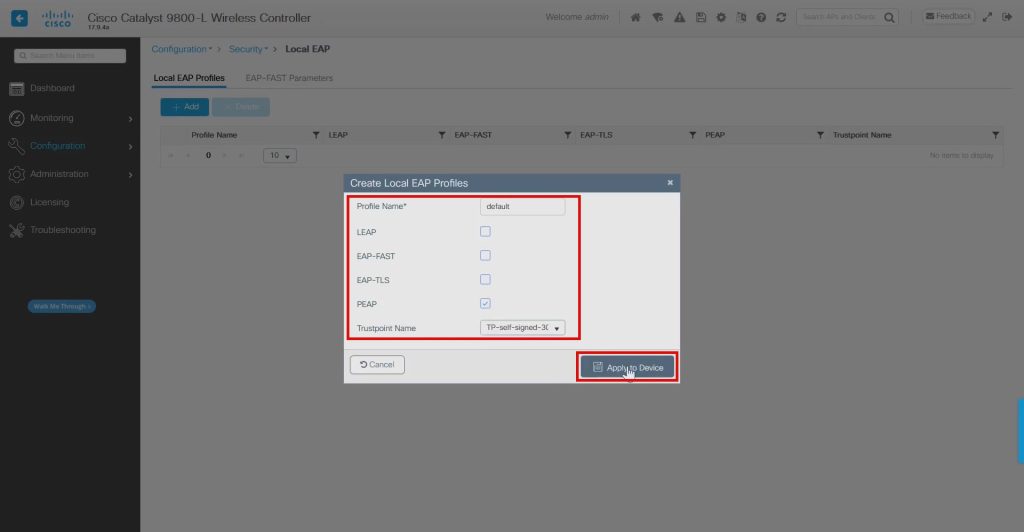
Profile Name : default
ติ๊กถูกที่ PEAP
Trustpoint Name : เลือกเป็น TP-self-signed-….
2. สร้าง AAA Method List
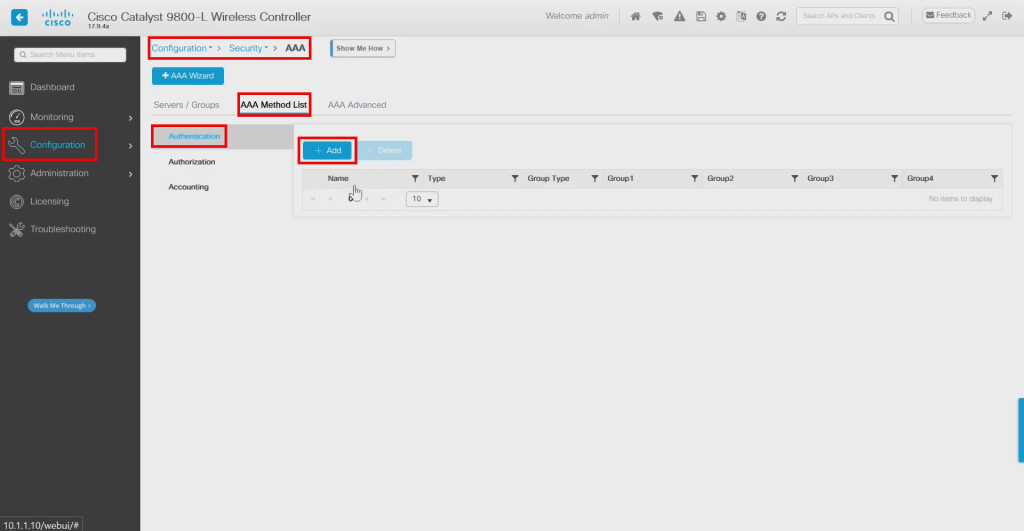
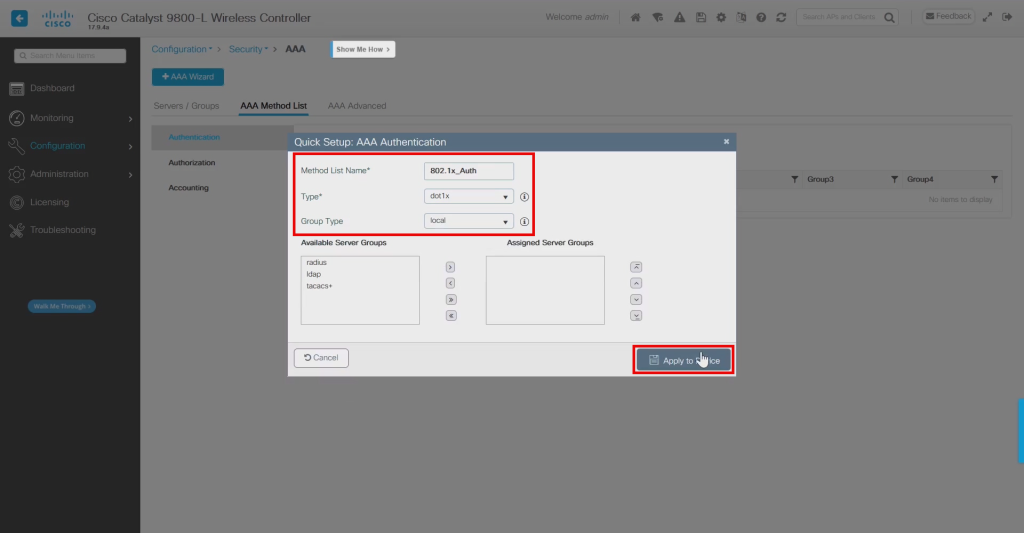
ไปที่ Configuration –> Security –> AAA –> AAA Method List –> Authentication –> + Add
Method List Name : 802.1x_Auth
Type : dot1x
Group Type : local
เลือก Apply to Device
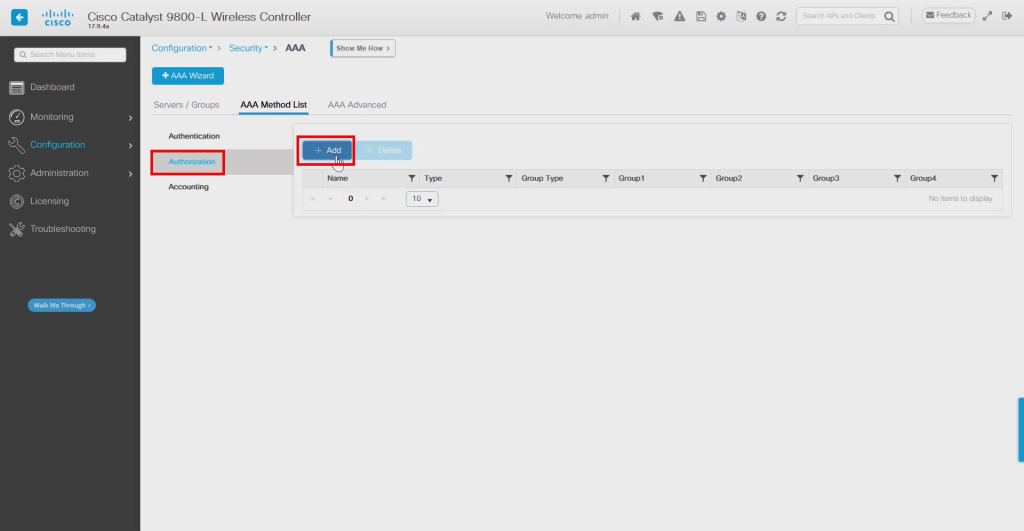
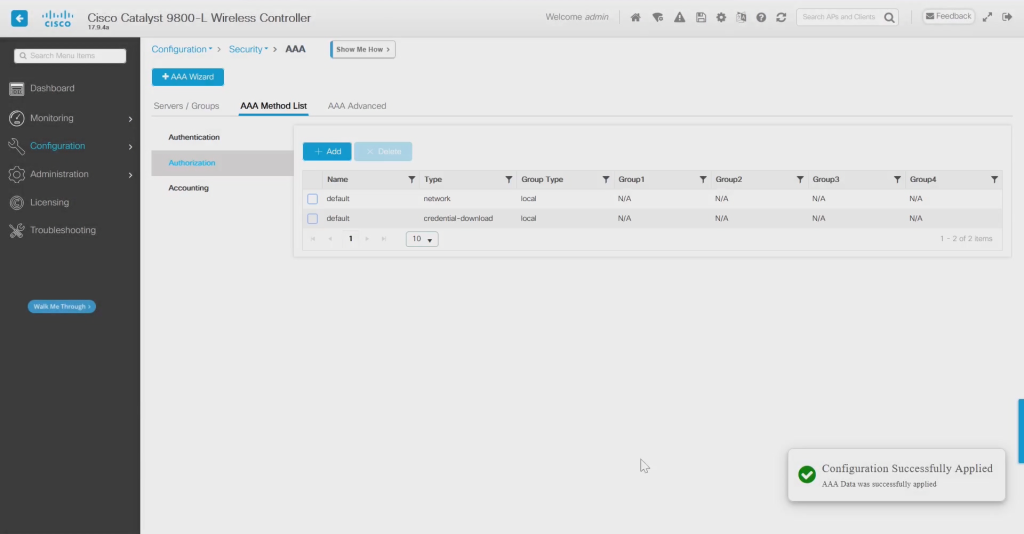
ไปที่ Authorization –> + Add
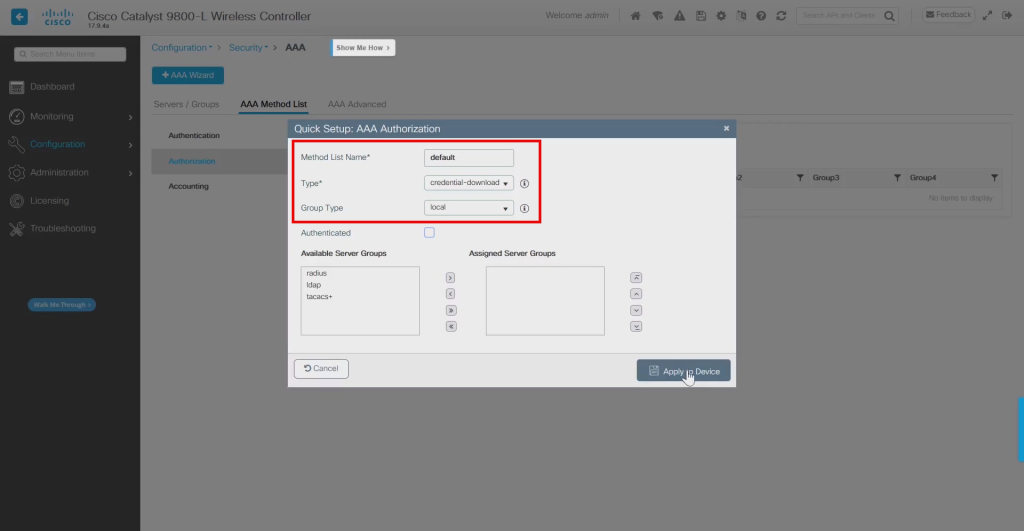
Method List Name : default
Type : credential-download
Group Type : local
คลิก Apply to Device
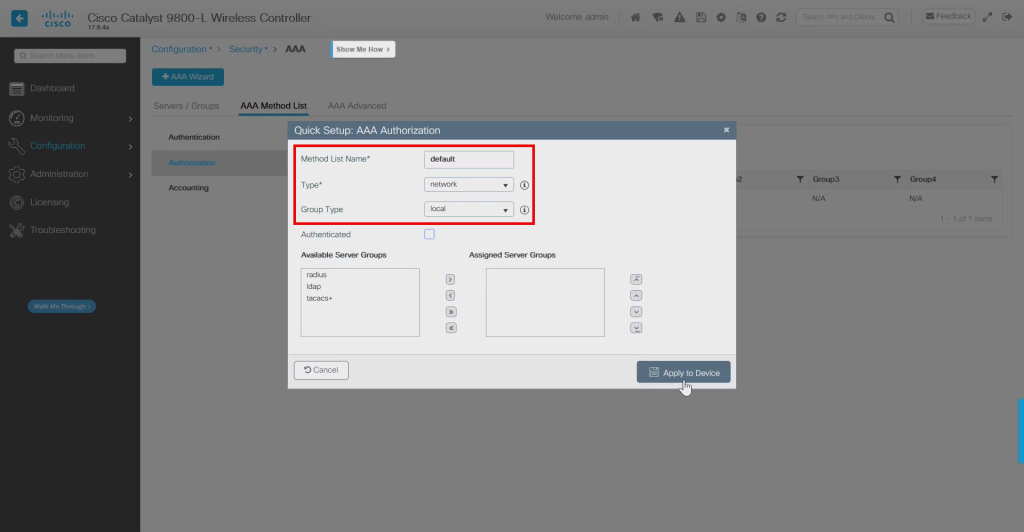
สร้าง Authorization อีก 1 รอบ
Method List Name : default
Type : network
Group Type : local
คลิก Apply to Device
3. สร้าง WLANs Profile
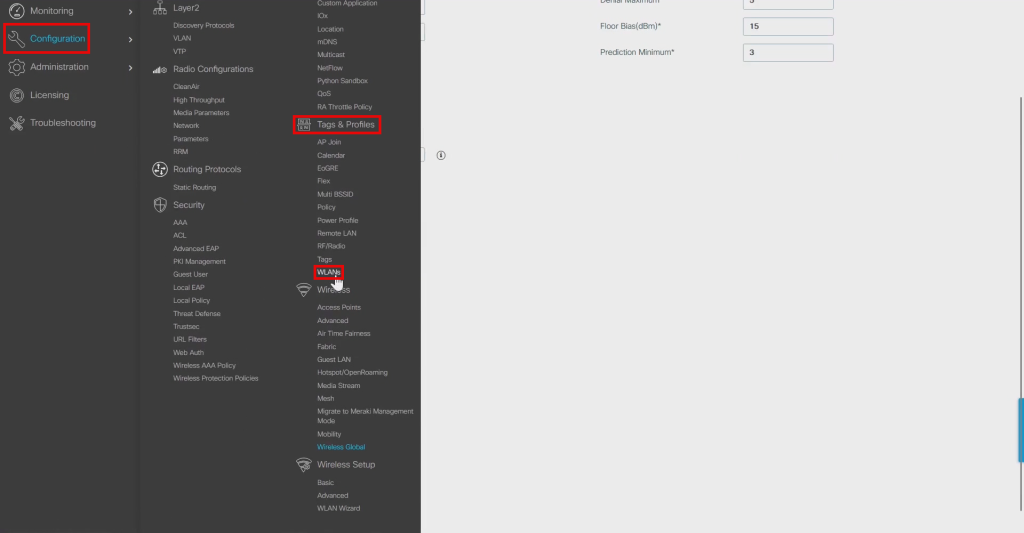
ไปที่ Configuration –> Tags & Profiles –> WLANs
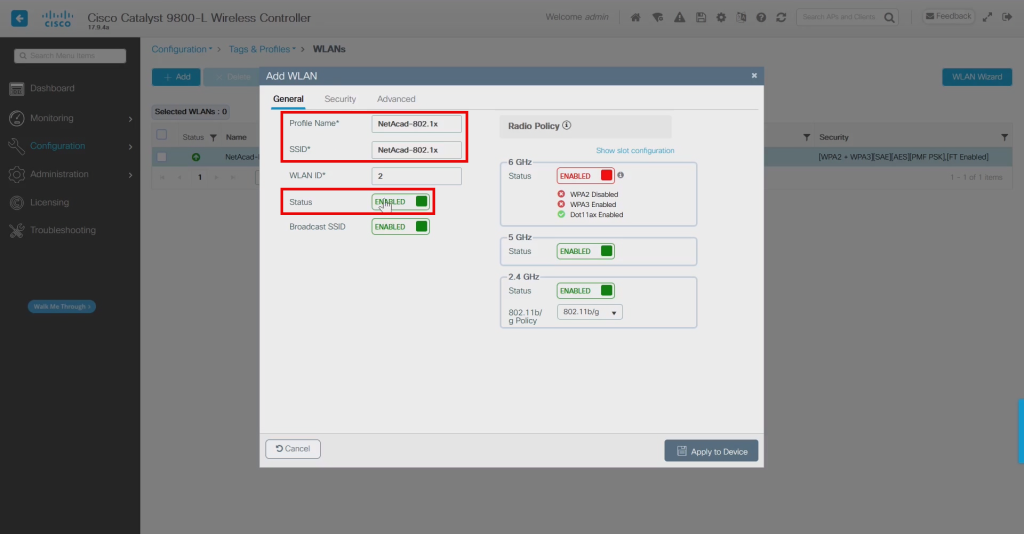
ตั้งชื่อ Profile Name และ SSID –> เลือก Status Enable
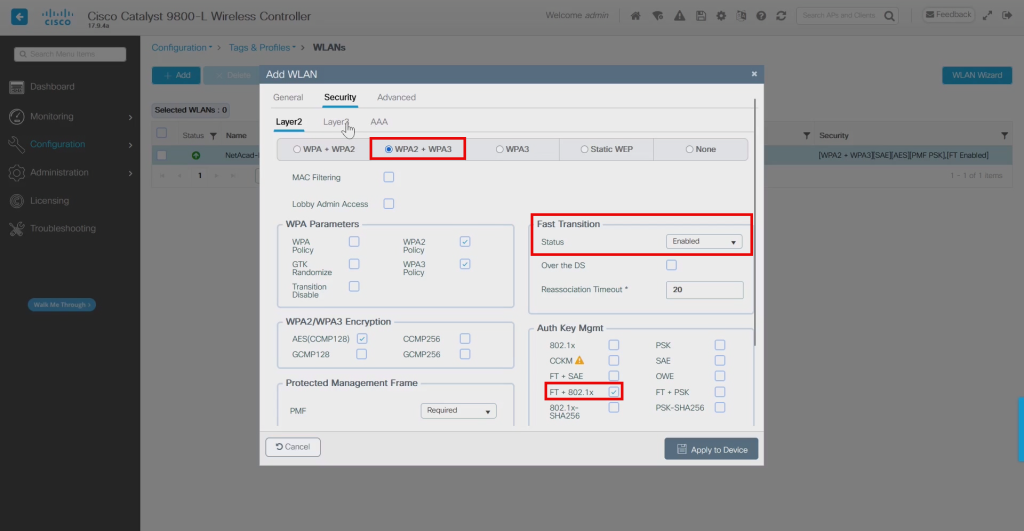
เลือก Security / Layer2 เป็น WPA2 + WPA3 หรือจะเลือกเป็น WPA + WPA2 ก็ได้ครับ
Auth key Mgmt เลือกเป็น FT + 802.1x และเปิด Fast Transition เป็น Enabled
หากต้องการ Tuning สามารถ Tuning ได้ตามต้องการได้เลยครับ แต่ในตัวอย่างนี้จะเลือกเป็น Standard กลางๆไว้ก่อน
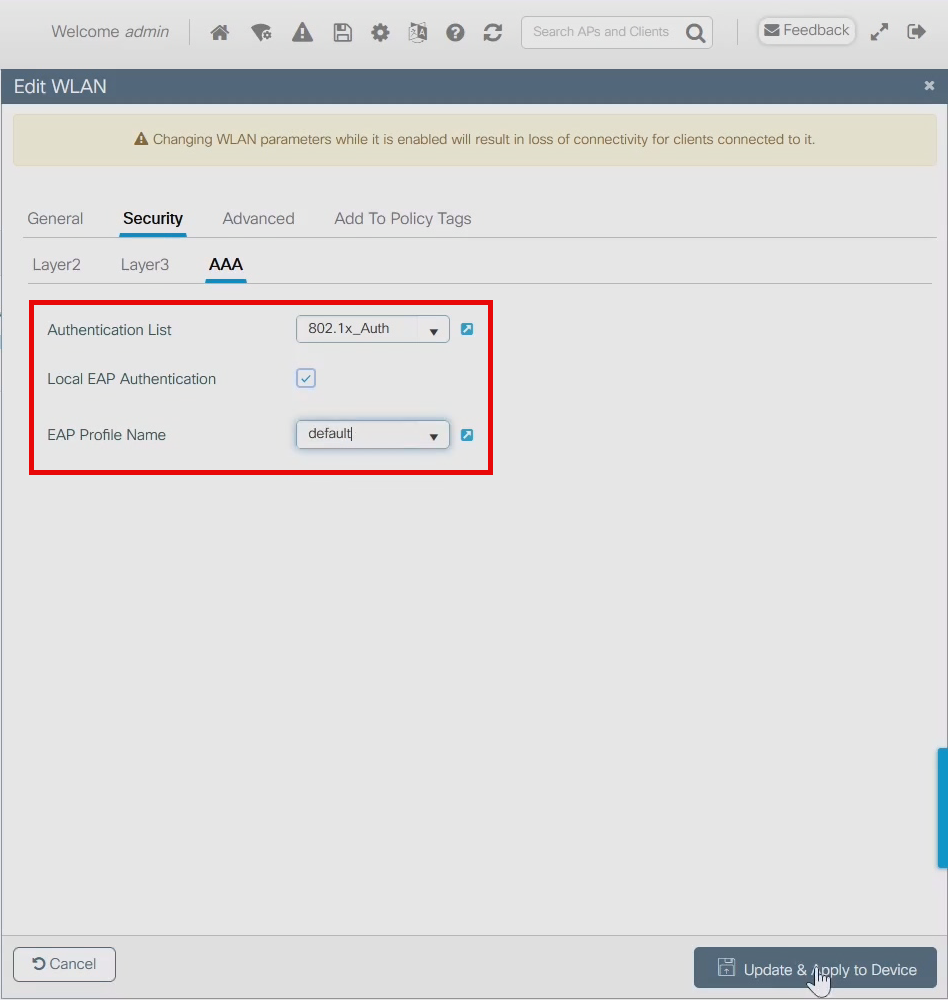
ไปที่ AAA –> เลือก Authentication List เป็น 802.1x_Auth
ติ๊กถูกที่ Local EAP Authentication
EAP Profile Name : Default ที่เราได้สร้างไว้ในข้อ 1
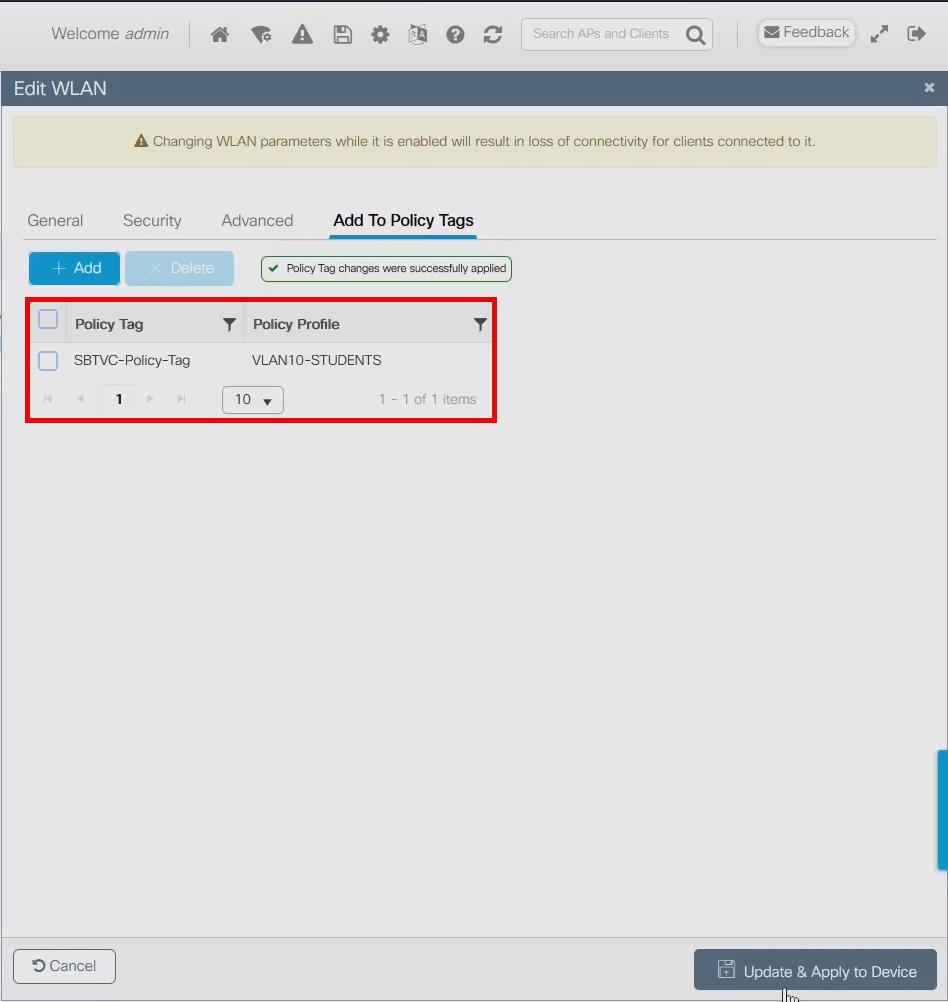
ไปที่แถบ Add To Policy Tags –> แปะ Policy Tag กับ Policy Profile ที่เราต้องการ
คลิก Update & Apply to Device
4. สร้าง User ที่จะใช้งาน
ในการสร้าง User เราต้องทำผ่าน CLI เท่านั้นครับ โดยมี command ประมาณนี้
conf t
user-name cisco123
 description Local_802.1X_User
 password 0 cisco123
 type network-user description Local_802.1X_User
end
write memory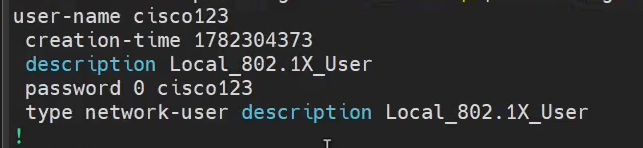
5. ทดสอบการใช้งาน
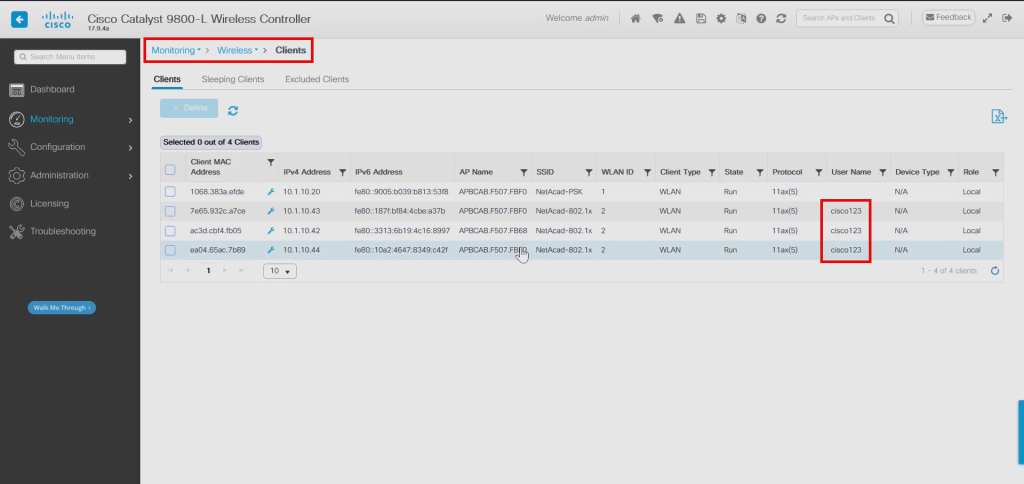
เมื่อ Login เรียบร้อยแล้ว สามารถไปตรวจสอบว่าเห็น Client แล้วหรือยังบน C9800
โดยไปที่ Monitoring –> Wirelesses –> Clients ก็จะเห็นว่า มี Client ที่ authen เข้ามาแล้วครับ
หากเกิดปัญหา Authen ไม่ผ่าน และมี Logs ขึ้นมาว่า username/password ไม่ตรง ดังรูป

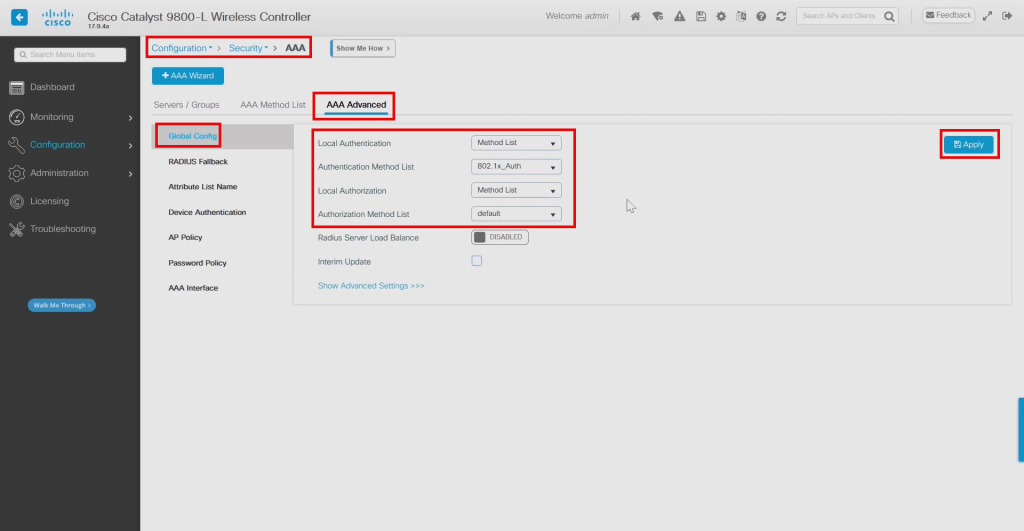
ให้ลอง เปลี่ยน AAA Advanced –> Global Config เป็น Local auth / Local AuthZ เป็น method ที่เราสร้างไว้ในข้อ 2 –> Apply
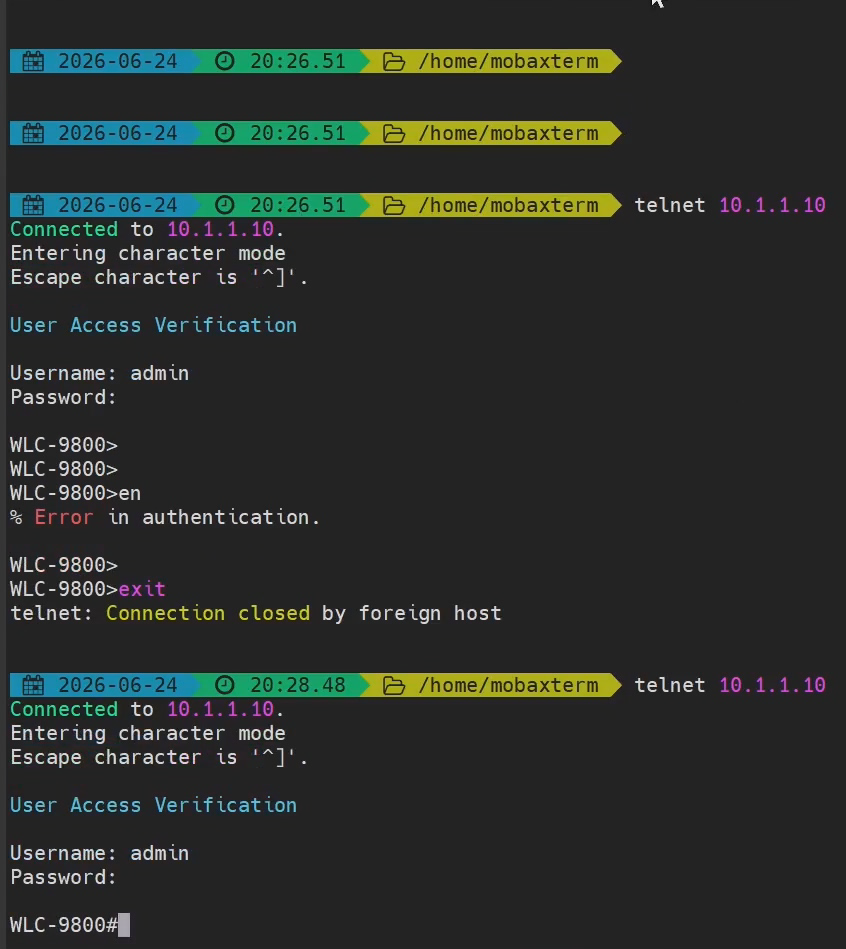
และหากเกิดปัญหา เมื่อ Configure เสร็จแล้ว แต่เราจะ SSH ไปยัง C9800 แต่ไม่สามารถเข้า enable mode ได้
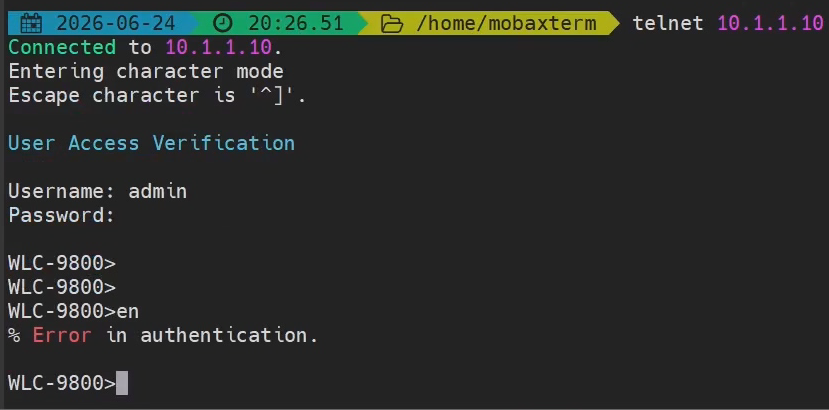
เมื่อเปิดใช้งาน aaa new-model ระบบจะเปลี่ยนไปใช้ AAA method list ในการตรวจสอบสิทธิ์แทนค่า default เดิมของ IOS ทั้งหมด รวมถึง enable authentication ด้วย ไม่ใช่แค่ login ของ line vty เท่านั้น หากยังไม่ได้สร้าง authentication method list สำหรับ enable ไว้ หรือสร้างไว้แต่ไม่มี local เป็น fallback จะทำให้ enable ล้มเหลวด้วย error “Error in authentication” ดังนั้นต้องสร้าง authentication และ authorization method list ใหม่ ผูกกับ local database แล้ว apply
aaa authentication login default local
aaa authorization exec default local
line vty 0 31
 login authentication default
ตัว WLC ก็จะสามารถ remote ได้เหมือนเดิม