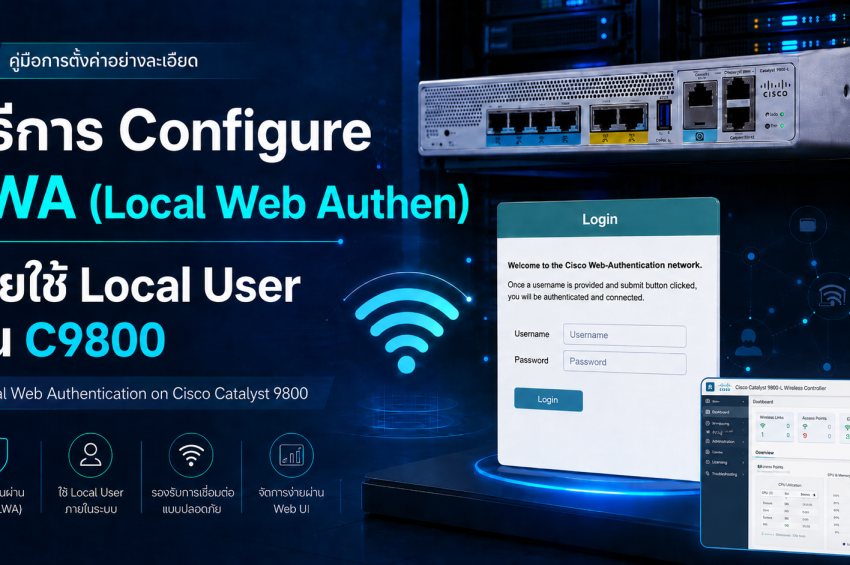
รูปแบบการเชื่อมต่อ Guest WiFi ที่นิยมใช้ เมื่อผู้ใช้งานเชื่อมต่อกับ SSID แล้ว ระบบจะยังไม่อนุญาตให้ใช้งาน Network ได้อย่างเต็มรูปแบบ แต่จะ Redirect ผู้ใช้งานไปยังหน้า Login หรือ Captive Portal เพื่อให้กรอก Username/Password, ยอมรับเงื่อนไขการใช้งาน หรือยืนยันตัวตนตาม Policy ที่กำหนดไว้ก่อน
สำหรับ Cisco Catalyst 9800 Wireless LAN Controller เราสามารถทำ Captive Portal ในลักษณะนี้ได้ด้วย Local Web Authentication (LWA) โดยให้ C9800 เป็นตัวจัดการ Web Authentication และ Redirect Client ไปยังหน้า Login ก่อนอนุญาตให้เข้าใช้งาน Network
บทความนี้จะอธิบายวิธีการ Configure Local Web Authentication (LWA) โดยใช้ Local User บน Cisco Catalyst 9800 ตั้งแต่การสร้าง Local User, AAA Authentication, Web Authentication Parameter Map, WLAN และ Policy Profile ไปจนถึงการทดสอบ Login ผ่าน Captive Portal จากฝั่ง Client
1. สร้าง Web Auth Parameter Map
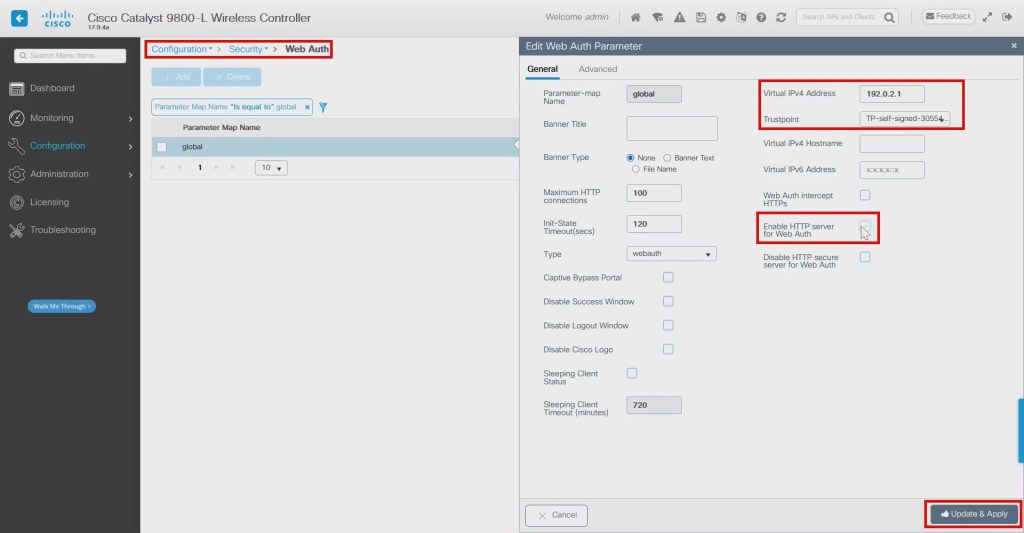
ไปที่ Configuration –> Security –> Web Auth
ทำการใส่ค่า Virtual IPV4 address (เป็น ip สำหรับ captive portal โดยแนะนำเป็น non-routable address proposed on RFC 5737) จะใช้เป็น 192.0.2.1
ตั้งค่า trustpoint เป็น ssl cert โดยใช้เป็น default “TP-self-signed-xxx”
ติ๊ก Enable HTTP Server for Web Auth หรือจะไม่ติ๊กก็ได้ แต่จะติดประเด็นเรื่อง ssl cert แนะนำให้ติ๊กไว้ดีกว่า สำหรับใครที่ยังไม่มี ssl public cert แนะนำติ๊กไว้ครับ
คลิ๊ก update and apply
2. สร้าง AAA method List
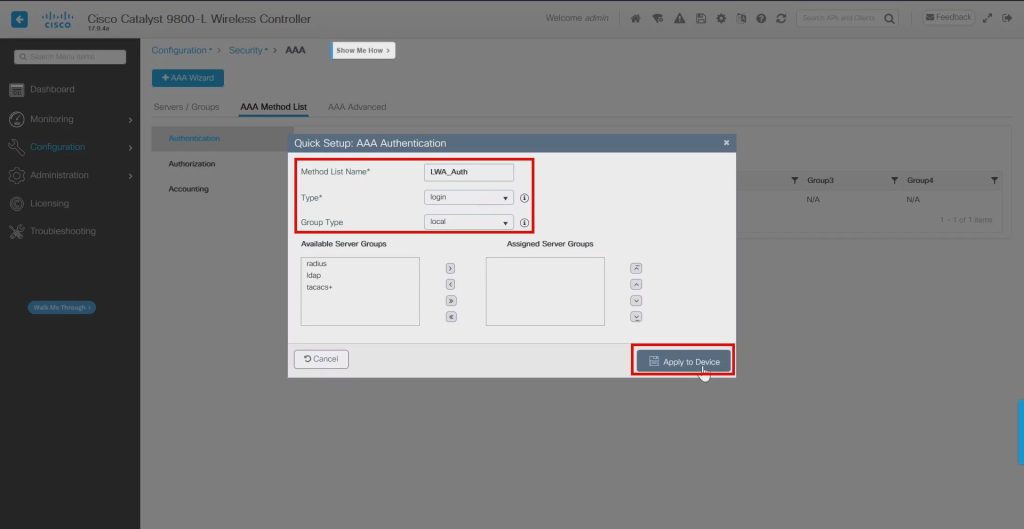
ไปที่ configuration –> Security –> AAA
ไปที่แถบ Authentication –> Add
ตั้งชื่อ Method List name
เลือก type เป็น login
Group Type เป็น local
คลิ๊ก Apply to Device
ไปที่แถบ Authoriation –> Add
ตั้งชื่อ method list name เป็น default
Type = Network
Group Type = Local
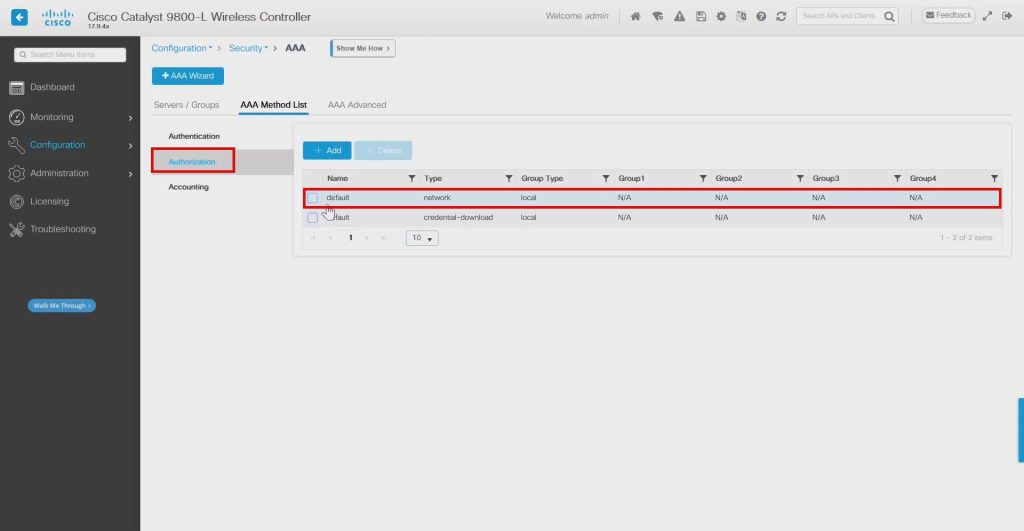
หรือจะใช้เป็น CLI ตามนี้ได้เลยครับ
9800WLC#configure terminal
9800WLC(config)#aaa new-model
9800WLC(config)#aaa authentication login LWA_Auth local
9800WLC(config)#aaa authorization network default local
9800WLC(config)#end
3. สร้าง Guest Users
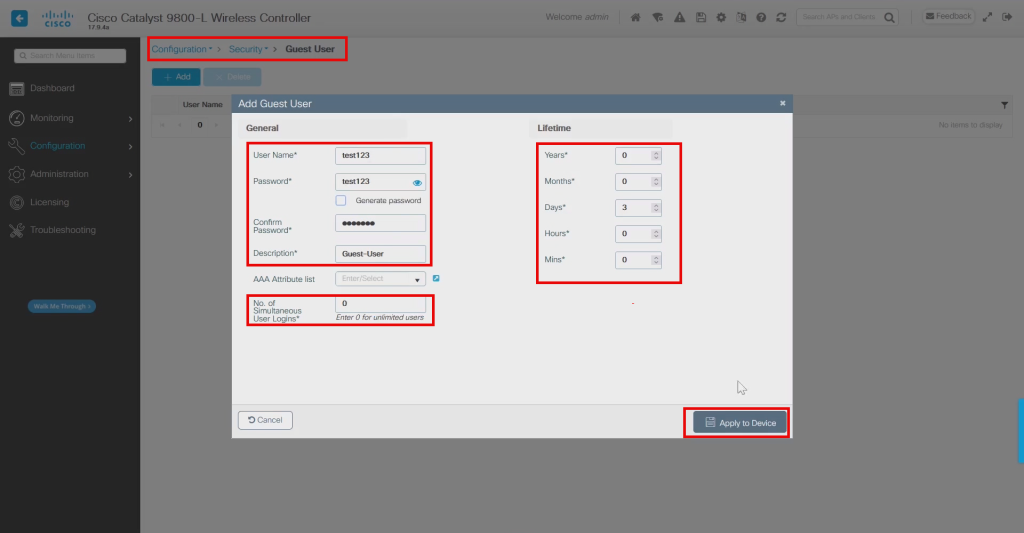
ไปที่ Configuration –> Security –> Guest User –> Add
ตั้งค่า username/password
ตั้งค่าอายุของ account
ตั้้งค่าจำนวนผู้ใช้งานต่อ 1 user
4. สร้าง WLAN
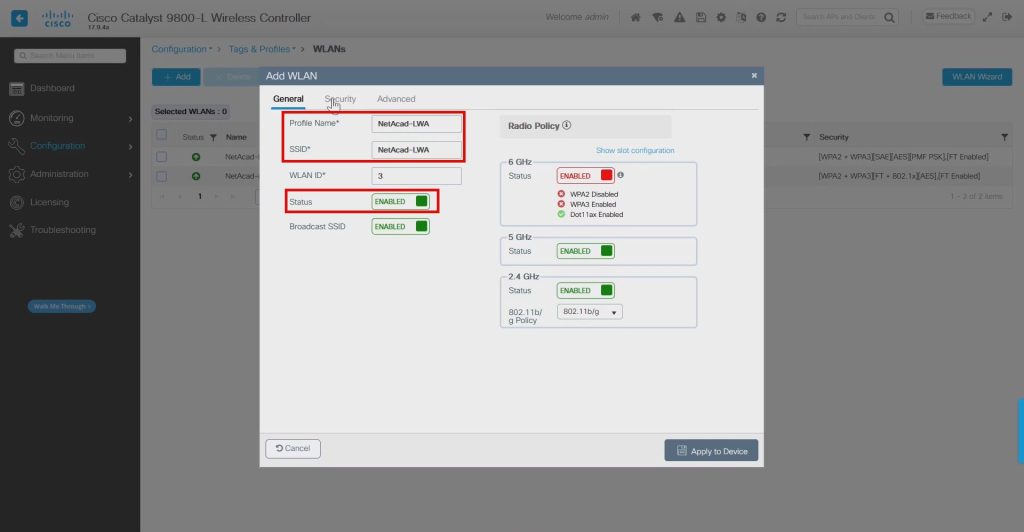
ไปที่ Configuration –> Tags & Profiles –> WLANs –> Add
ตั้งชื่อ Profile Name / SSID
ติ๊ก Enable ที่ Status
ไปที่แถบ Security
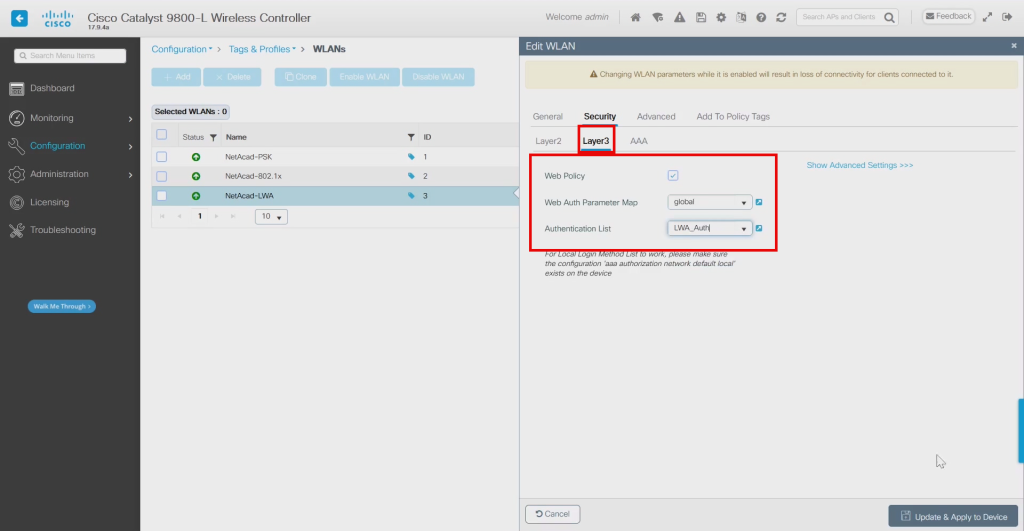
เลือก Layer 3
ติ๊ก Web Policy
เลือก Web Auth Parameter Map ที่เราได้ทำจาก ข้อ 1
เลือก Authentication List ที่เราได้ทำจากข้อ 2
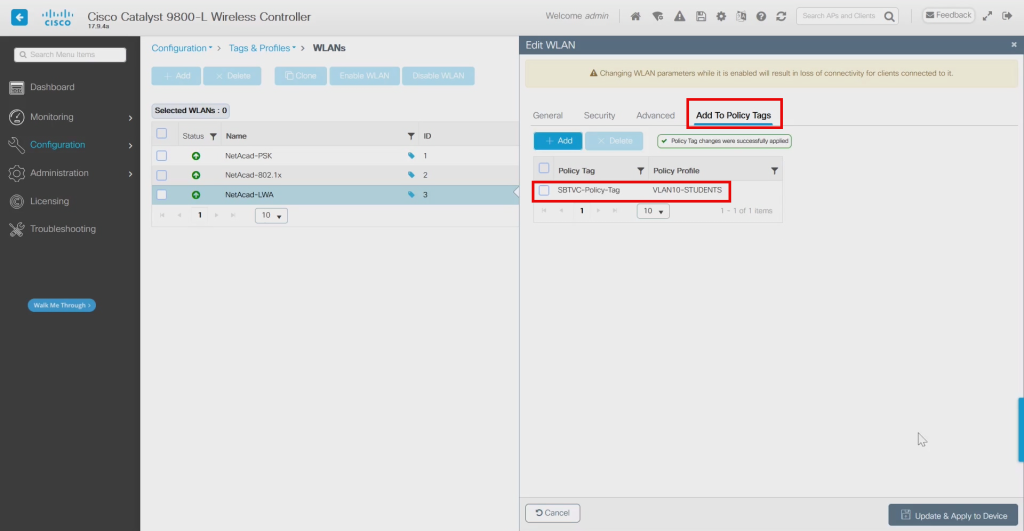
เลือก Policy Tag และ Policy Profile ที่เราต้องการ
คลิก Apply
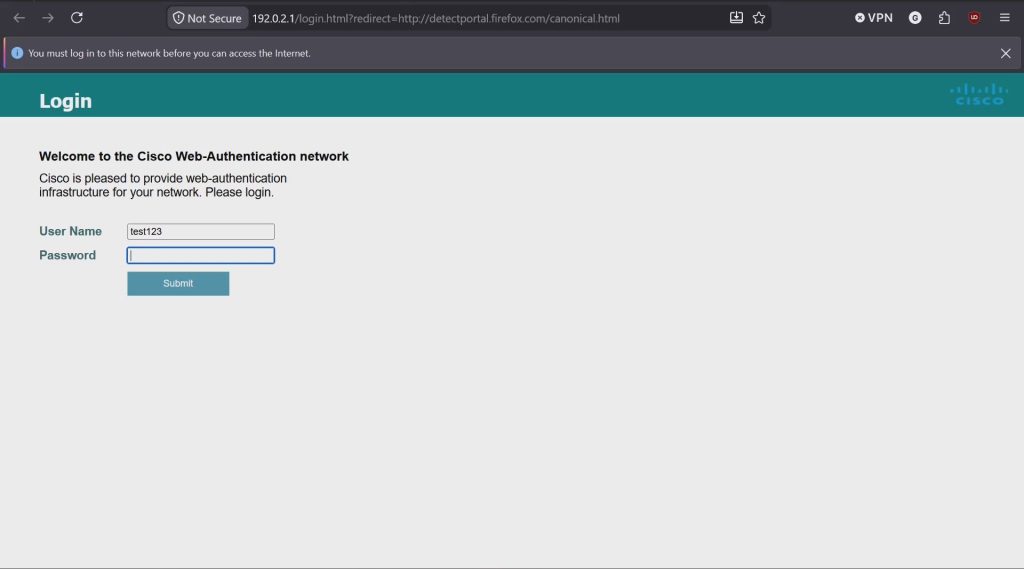
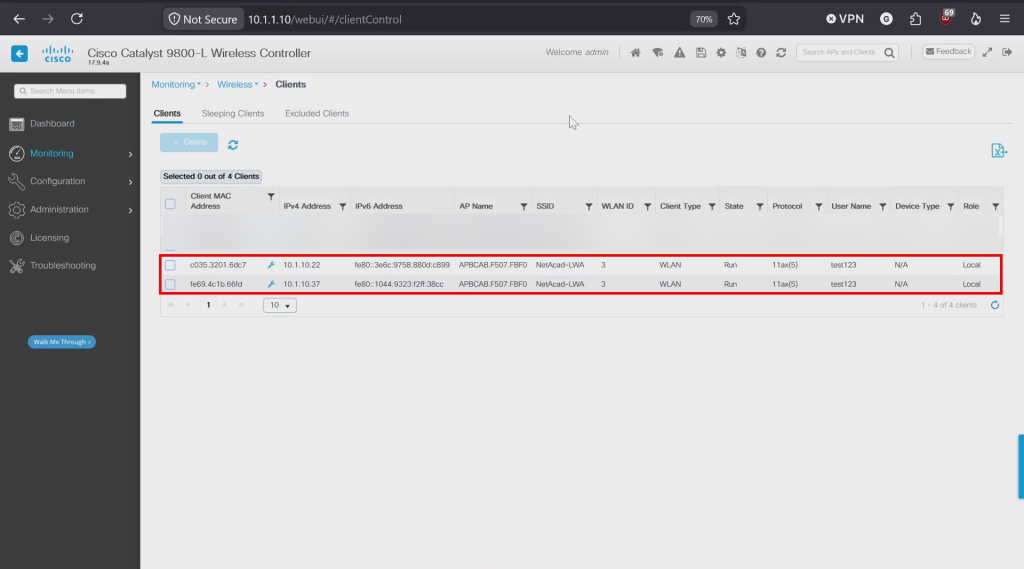
เมื่อ config เสร็จสิ้นแล้ว และลองเชื่อมต่อ WiFi จะเด้งหน้า captive portal มาให้เราครับ